Friday, July 1, 2011

Looped Flower Tutorial!

Good Morning! I'm here today to share with you all what I call the looped flower that I made on my last layout for SOUS!
Supply list

Mother's Day Bouquet Cartridge
2 - 2 " loop flower
2 - 1 3/4" loop flower
2 - 1 1/2" loop flower
button or center of your choice
embroidery floss
adhesive
Glimmermist
distress ink
blending tool
foam pad
stylus or paint brush
scissor


 I used Aged Mahogany to ink the edges of my flowers.


Take each flower individually and press the stylus into the flower following the shape of the flower on the top side[ on your foam mat] This will give it a cupped look.


Take your Glimmermist and lightly mist the flowers, I used a clear pearl color just for some glimmer.


Start gluing your flower together starting with the largest to smallest, staggering the petals.


Take your embroidery floss of thread and tie it to the button.  I  used embroidery floss, not separating the threads until after I tied it.  I gives it a fun look.


Take your adhesive and glue the button onto the top of your flower.  You can leave it like this, as I did on my latest layout "Shh..." OR


You can take a squire and roll the edges of each petal down for a more polished look. Ta DA!  You are now done!  Pretty easy, eh?  The flower is limited only to your imagination.  Thanks for joining me today!  I hope you all give this flower a try and use it on your next layouts!  

Friday, June 24, 2011

Shhh...! Its Friday Reveal Time!

Hello all you lovely followers!  Today I want to introduce  my great niece, Lucia Tate, all on her own!  Last time you met her with her big sister Cassidy. I'm sure the two of them will be best of friends when Lucia gets a little older.  The sketch this week at Stuck on U Sketches is brought to us by the lovely Liz Qualman!  I always enjoy working with her sketches.  I decided to use the Graphic 45 kit I got from ScrapThat!, I believe it was their March kit.  I just love this kit, and the papers are soo gorgeous!  


I did some machine stitching, and used my Zutter Distrezz It All. I love the white paper doily I used to represent the circle!  I've been having great success in buying them at my local thrift store! If you don't already, you should check out yours and see what goodies you can find!

Here is the sketch by Liz.


Look at these flowers I made using my Cricut!  I bought the Motherday Bouquet cartridge to make some flowers for my daughters wedding, and I just love that cart!  There are so many different flowers you can make with it! I made 2 of these flowers with that cart, and the larger on with Plantin  School book.


The letters I used came with the kit and I believe are Thickers.


I will be making a tutorial on this flower and be presenting it on July 1 at Stuck on U Sketches, as well as here on my blog.


I purchased some new stamps by Pink Paislee from their Butterfly Garden Collection.  I used a few of the stamps on my layout.  You can see here I used "le jardin".


I did some paper tearing and stamped some flora stamp inside and a dragon fly using Ranger Archival Ink in Coffee.


You can see on the corners of the photo, I used my corner loopy punch by Martha Stewart, used some Webster bloomers that came with the kit, as well as some pink half pearls along the top of the picture matting.


I did a bunch of fussy cutting of the flowered pattern paper, and made a double banner with the garden fairies. I raised them up with pop dots.


Here are some close ups of the banners.  I used some bakers twine as the string.

Thanks for looking, and I hope you can join along and try this sweet sketch!  We'd love to see your take on it, and there is candy to be had!!

Hugs!

Friday, June 10, 2011

She's Got the Look at SOUS!!

Another Friday reveal over at Stuck On U Sketches and we have a beautiful 
sketch  by Beggahuna.  I love her sketches, as they usually always challenge me from my normal scrapping style, and this sketch was no different!  As soon as I saw this sketch I knew exactly which photos I was going to use!  This is my great niece Cassidy, and she instinctively knows what to do in front of a camera! 


I had so much fun making this layout!  First I want to tell you about the flowers I made!  They are peonies, and I got the Peony tutorial from Tammy [simply me] at Swirlydoo's.  The great part is that you get to use your Cricut!  I used my Cricut to cut out the letters for my title [the look] I used Pink Paislee's resist paper and various distress inks to highlight the areas where I was placing my photos and embellishments.

Here is the sketch from Beggahuna .


Here is a close up of the  peony flowers.  I made them from white cardstock and then inked them with my distress inks.  I used 3 of my Martha Stewart punches for the borders and ran a strip of daisy ribbon down the center.


Another close up of one of the flowers.


In these close ups of Cassidy you can she her impish grin and her pouty lips.  For a 3 yr old she knows how to work it!  The black scroll flourish I got from Nicklin Designs 1225, and cut it up to suit my needs.


I used some more Dusty Attic's Foliage  that I inked and used Crackle Distress paint in Rock Candy.   Love the way it looks!


Just another angle.  Over all I was quite impressed with myself with all the white space I left and think I did a pretty darn good job with this sketch!  Thanks so much for stopping by and taking a look!  Please leave a comment, as they surely brighten my day!  Don't forget to check out the other design team members work over at SOUS , and leave them some loving too!  Hope you all have a blessed weekend!

Sunday, June 5, 2011

Summer Kick off Blog Hop!

Featuring the blogs of Practical Scrappers, Stuck on U Sketches, Getting Cricky, Frosted Designs, Papercraft Star, and Pile it On! The hop runs until  June 11!


 Practical Scrappers (starting point)
Papercraft Star (go here next)
Frosted Designs


Our give away[StuckonUSketches] has been donated by Floren at www.GenerationsCrafting.com  and includes some yummy Bo Bunny Cambridge, including a mini album and assorted Cambridge papers as well as 3 dimensional stickers and matching brads. 


Sandy will choose a winner from those leaving a comment on our June 5th post and will announce the winner on June 12th. The winner will have one week to claim their prize by contacting her  at slclarkson at sbcglobal dot net.


Friday, May 27, 2011

Two are better than one!

Its reveal day again at Stuck on U Sketches, and I am so excited to share this Friday's sketch and my interpretation with you!  Since my dh and I just celebrated our 25th anniversary,  I decided it would be fun to scrap one of our wedding photos again.  This photo is of us sitting in the back of the limo and its a fav of mine. 


 I used Basic Grey's Curio pattern paper and loved how it went with my photo.


here is the sketch by our own Ness.!  Its gorgeous and just one of her many beautiful ones.  Be sure to check out her blog!

 . 
 I made the large flower with my Tim Holtz Tattered Floral die and used a I am Roses flower for the center and the smaller roses as well.  They started off white and I used distress ink and water and colored them.  I like to do it this way as then I can make them any color I need.  The green flowers are from Prima's E line. I used some Dusty Attic chippies behind the flowers that I had used Distress Stains and then covered with Rock Candy Distress Crackle paint.


Here you can see the pattern paper that looks like black lace.... I love it!  I use a string of pearl to separate the two patterns.  For the title I used some sweet Thickers that a scrappy friend brought to my attention and then let me buy them from her!!  Thanks Thelma!


I can't tell you enough how much I love Dusty Attic chippies! This vintage hanging lamp post is just gorgeous!  First I covered it with walnut distress stain and then walnut distress embossing powder.  I put a piece velum behind the chippie to look like glass. I used my new MS wild flowers PAP that I got for Mother's Day around the edge of the background paper and inked the edges to define it a bit more.


In this photo you can see the technique I used on the photo.  First I sanded around the edge of the photo to give it a worn look, and then I got a brain wave to used Distress Embossing powder!  I am sure others have done this as well, but it was the first time I thought of it. lol  I used 3 smaller doilies behind the photo, and left it plain.  I know! Shocking isn't it?  I didn't add ink or anything!!


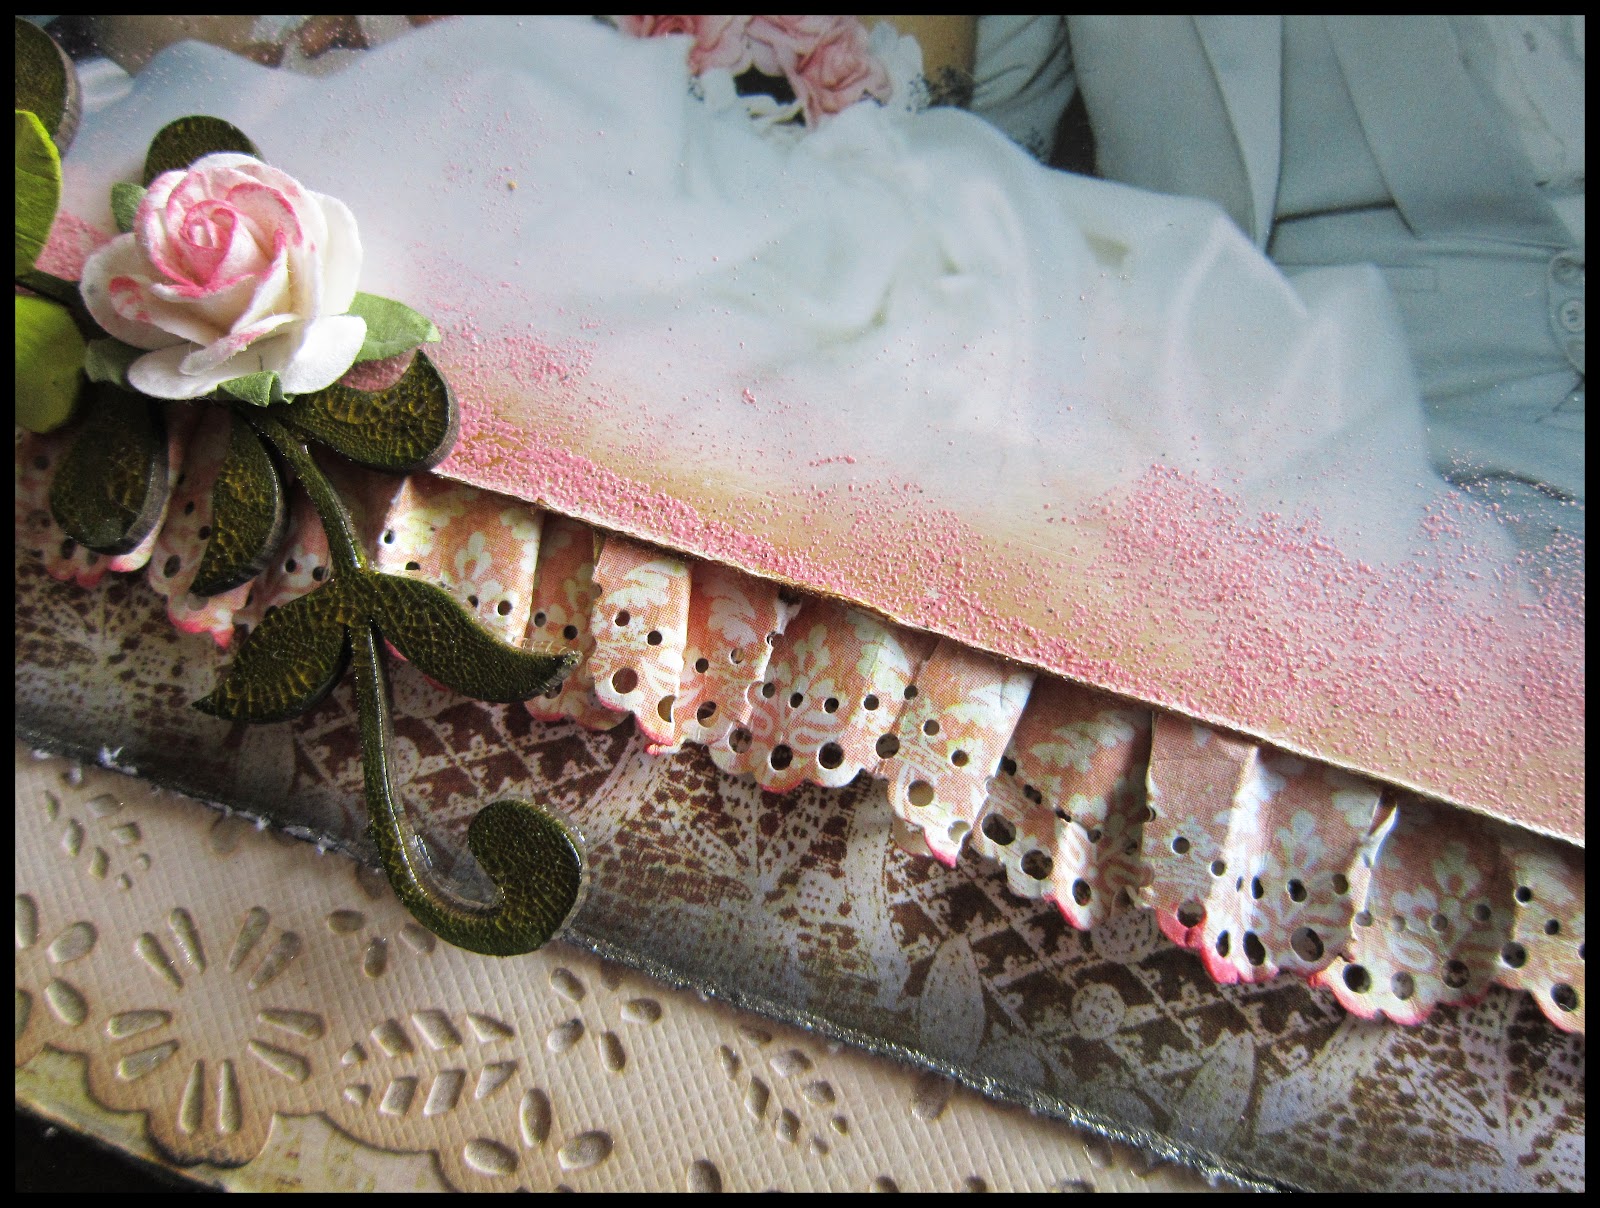
At the bottom of the photo I used a strip of paper that I had used my MS doily punch and ruffled it. I love the soft touch it gives.

Wednesday, May 25, 2011

Mixed Media fun and cards?

Hi everyone!  I hope you are all doing well.  I wanted to share some stuff I've done that is new for me!  I've been wanting to try some mixed media on a canvas for some time, and did a small one for a friend for her birthday this past December.  I bought a 16 x 20 canvas at the local Dollar store for $2, and figure I'd just give it a go!  I didn't know what I was going to do, but I did know it would have butterflies on it!  So, this is what I came up with!


I used so many different products that I have!  Starting off with gesso;  a mask I made with my cricket for the butterflies on the branch, and stencil for the branch with the cherry blossoms.  In the center I used a mesh bag for added texture.  I glued some pages from a vintage book around the edges with white glue, and once that was dry I spritzed it lightly with water and rubbed my finger over it take some of it away.

This floral area I used a TH stamp with Distress Embossing Powder and Stickles.

                                                                   close up of butterflies


 I used my new Martha Stewart butterfly punch to make the butterflies with the white pearls as their trail.  I used a lot of stamps on here.  My Martha Stewart butterfly stamps, music stamp, script stamp, some Tim Holtz stamps.  I stamped with distress inks and some white paint, I sprayed the background with Maya Mists, Smooch Sprays, Moonshadow Mists,. I Used Stickles , Smooch Ink, Distress Embossing Powder and Distress ink.  Almost everything but the kitchen sink!


 I used a script stamp I have by Heartfelt Creations on the white letters and spritzed a bit of Shimmerz Spray on them so they weren't quite so "white".


I used alcohol inks in a variety of colors on the word changed to signify the changes a butterfly goes through.  Hope you enjoyed looking at it!


Now I want to share with you the cards I made over the weekend while I was at an awesome weekend crop.  Not only was the crop amazing, but the fact that I actually made cards that is amazing!!


This card everyone made for a make and take.  It featured Tim Holtz and some of his products, mainly the distress inks and embossing powder.


 We had a few sketches we could do to put tickets into a draw for prizes, [I didn't win:(]  These 2 cards and done based on the sketches.  I was surprised that actually enjoyed it!  So, who know? You just may see more cards coming from me!


I used some of my left over pieces of my March kit from ScrapThat! to make this card.  I had to borrow some stamps with sentiments as I don't make cards! lol  All in all, it was fun and I am sure I will try it again.

Thanks for joining me, and come on back Friday morning as I will be revealing my next layout based on a sketch by Ness!

Friday, May 13, 2011

I adore you - Reveal day at SOUS!!

Sorry this is late.... had Blogger issues and couldn't upload yesterday!  We have another sketch challenge for you over at Stuck on U Sketches!  The sketch is designed by our talented Ness, designed only for SOUS!  Let me tell you, this was one fun sketch to work with!!!


This layout features another of my Great Nieces, Odessa.  I cropped the photo and changed it to b/w so it worked better with my papers.  I used some Basic Grey and DCWV, and Dusty Attics flourishes and birdhouse, machine stitching, distressing, inking and just plain had a blast making this layout!


I wanted to share a close up of the dusty attic flourish chippie I did.  I used a technique by Natasha Aranjo Aguirre found here on the Dusty Attic forum.  This was alot of fun to do!  I didn't use the exact supplies she did, as I don't have any Glimmer Mists as of yet.  I also added some Liquid Pearls drops to the flourish.


 I made this flower using my TH Tattered Florals die and distress inks.  I edged the petals with white puffy paint and then assembled the flower.  I wanted to bring a aqua blue shimmer to the flower to tie it into other area of my layout, so I used my Treasured Island Aqua Moon Shadow Mist by lindy stamp gang.  These mists are awesome, especially for vintage layouts.  They have an amazing shimmer combined with the sepia tones.

 I hope you enjoyed my layout!  You have 2 wks till the next sketch challenge so get to work and lets see your layouts!  Thanks for coming!